> ## Documentation Index
> Fetch the complete documentation index at: https://partner.headout.com/docs/llms.txt
> Use this file to discover all available pages before exploring further.
# Integration walkthrough
## Overview
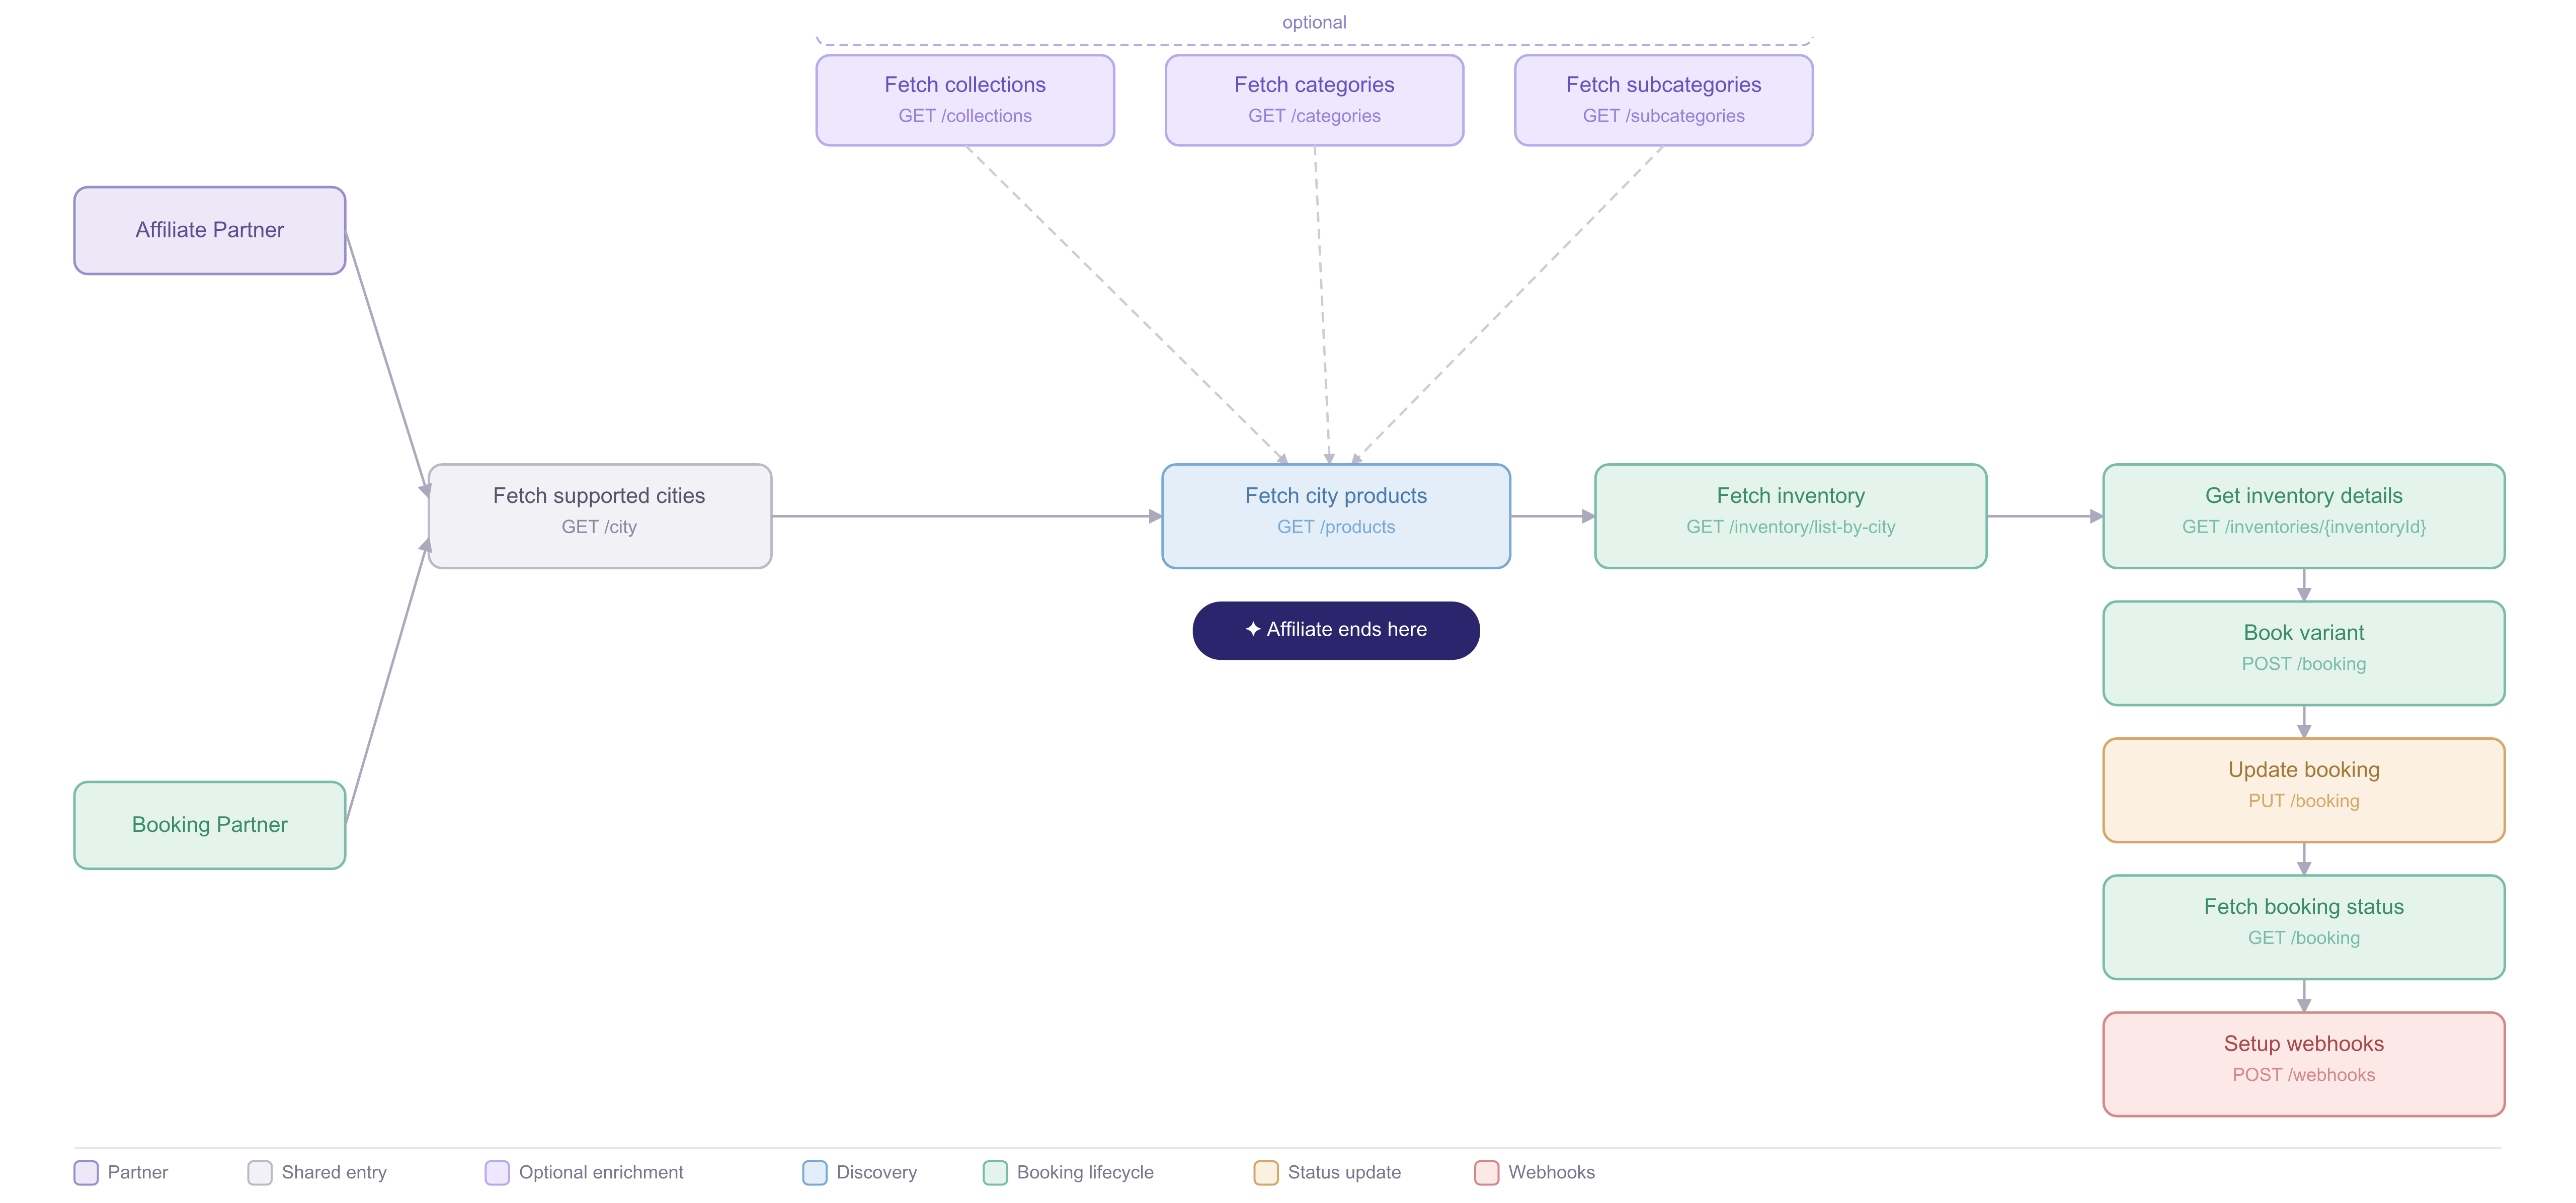
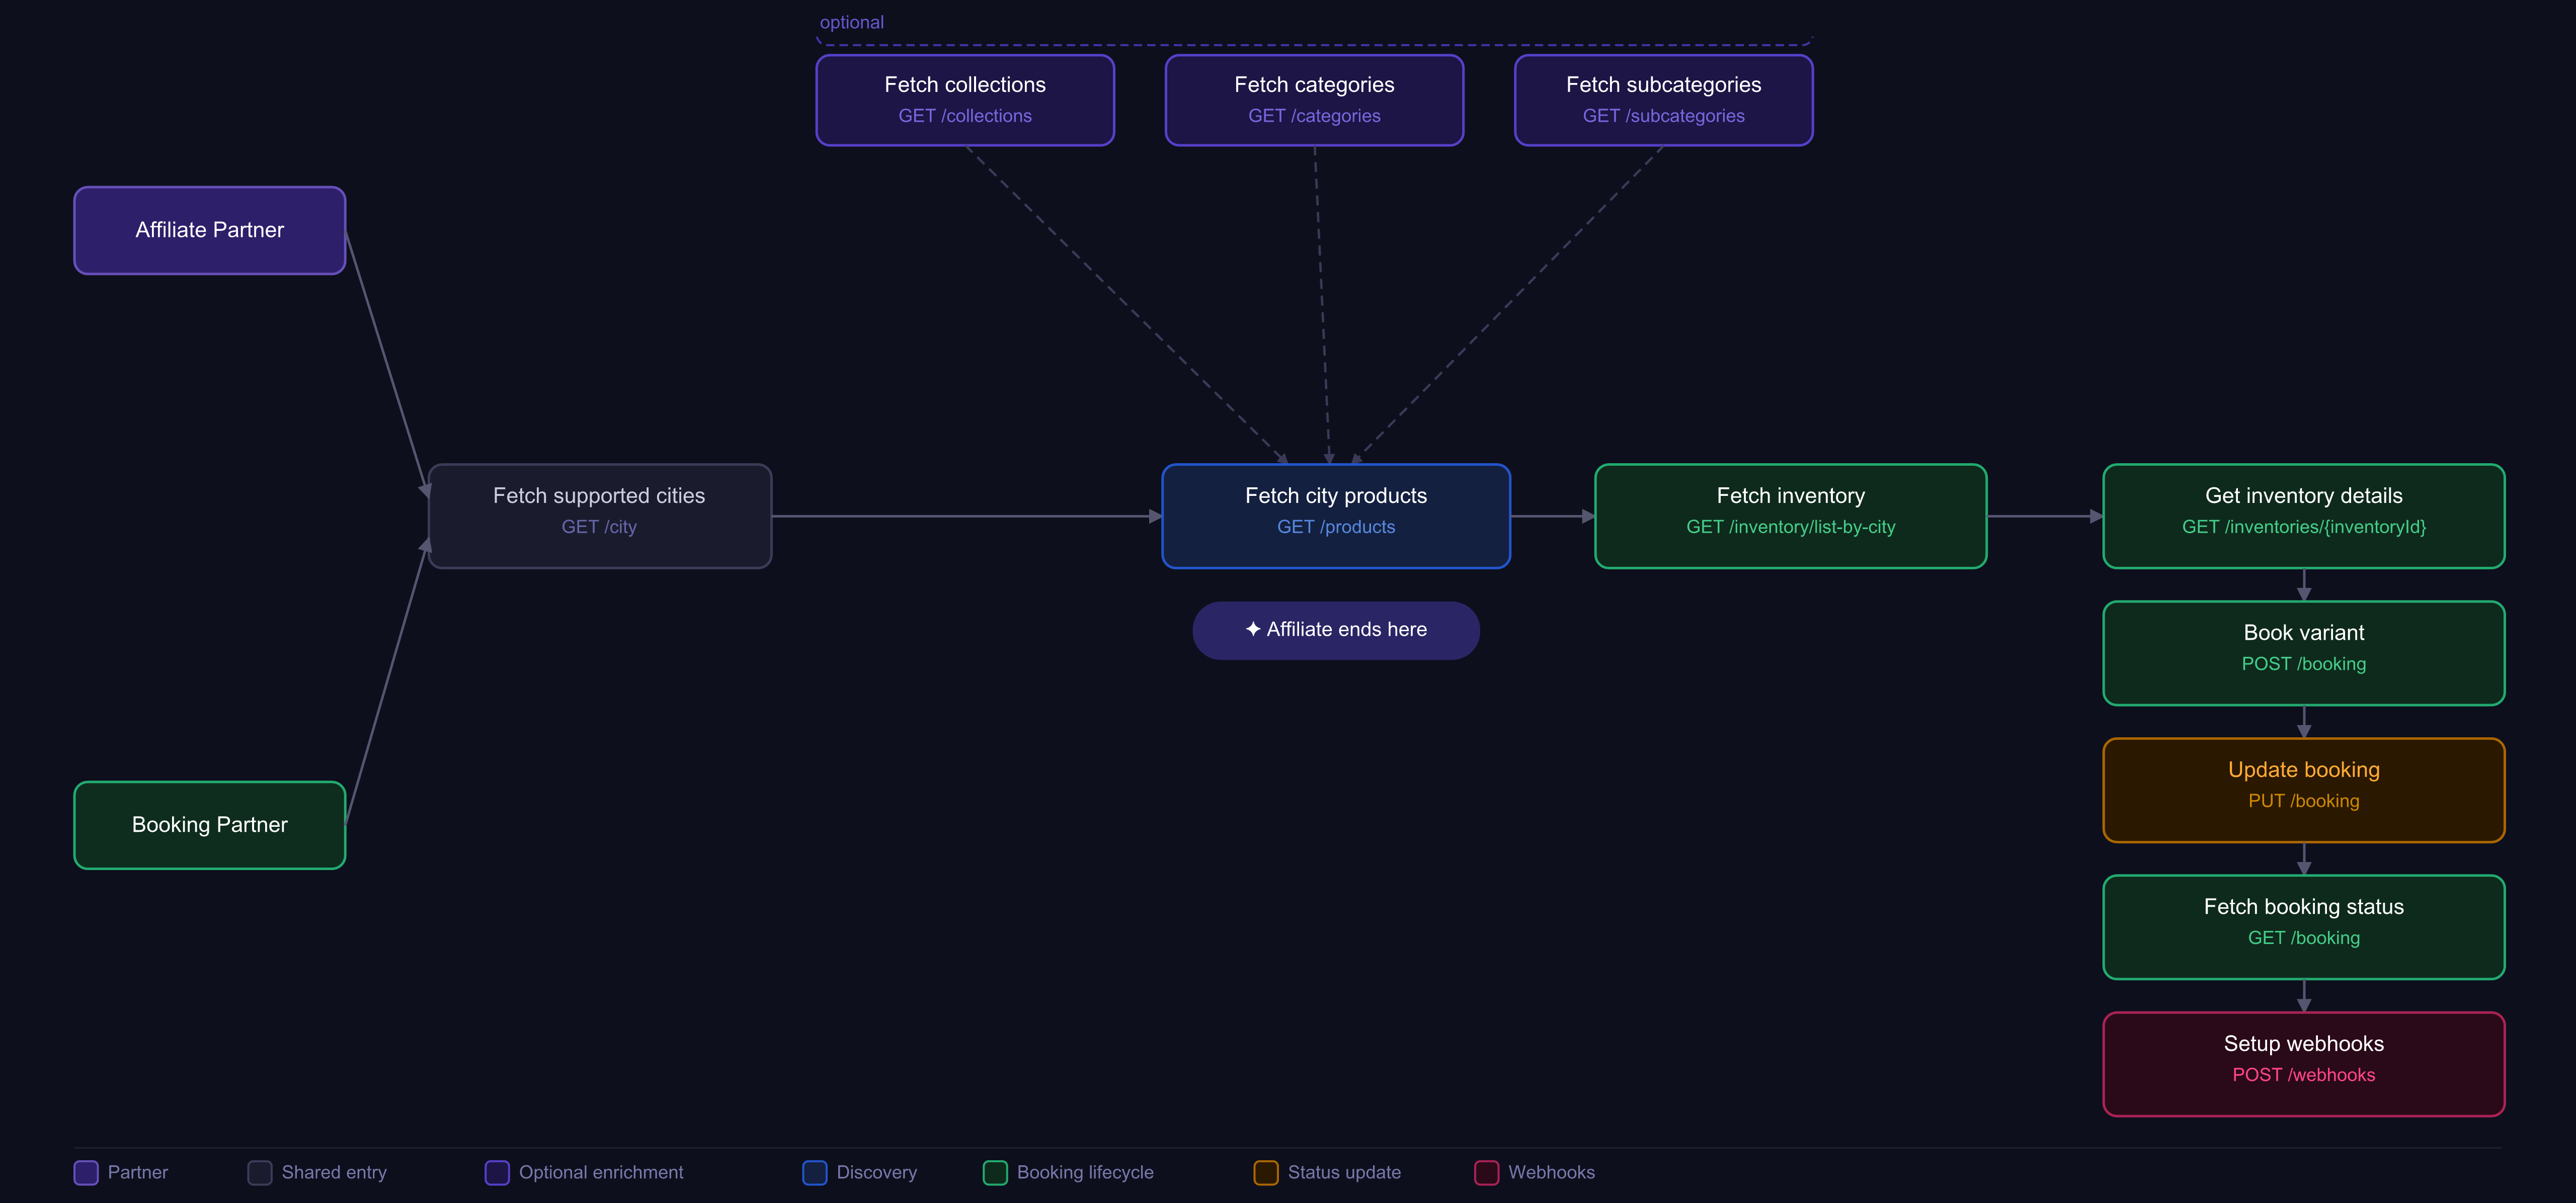 The [Get Product](/docs/api-partner/v2/products/get) response includes an `inventorySelectionType` field. Use it to determine which integration flow applies:
* **`NORMAL`**: Standard general-admission products (guided tours, timed-entry attractions, activities). Customer selects a date, variant, and optional time slot; no seat or section assignment required.
* **`SEATMAP`**: Products with specific seat selection. Customer picks individual seats from an interactive seatmap.
* **`SVG`**: Products with section-based seating. Customer selects a section; seat assignment is automatic.
### Discover what to sell
**API:** [List Cities](/docs/api-partner/v2/cities/list)
Start by fetching the cities Headout supports. Each product is tied to a city.
**What you get:** city code, city name, country, and coordinates.
**API:** [List Products](/docs/api-partner/v2/products/list)
Use the city code to fetch the products available in that market. Filter by collection, category, currency, or language.
**What you get:** product summaries, titles, pricing, media, and category metadata.
**API:** [Get Product](/docs/api-partner/v2/products/get)
Pull the full product record for variants, policies, media, and booking fields required later in the flow.
**What you get:** variants, pricing tiers, input field definitions, cancellation and reschedule policies, and deep-link URLs.
Read each variant's `inputFields` carefully. They define the guest data you must collect before creating the booking.
### Check availability
**API:** [List availabilities - Normal](/docs/api-partner/v2/availabilities/normal-availabilities)
Fetch available dates and pricing for a specific variant within a date range. Use this to build a calendar or date picker before the customer selects a specific slot.
**What you get:** available dates, availability status (`LIMITED`, `UNLIMITED`, `CLOSED`), remaining count, and minimum pricing per date.
`remaining: 1000` is a sentinel value indicating unlimited availability.
**API:** [List Inventory - Normal](/docs/api-partner/v2/inventory/list-by-tour)
Once the customer selects a date, fetch real-time slot inventory. Inventory is slot-based and can change quickly, so do not cache it.
**What you get:** time slots, pax types, `netPrice`, and `headoutSellingPrice`.
Never sell below `headoutSellingPrice`. Pax types and prices can vary by slot even for the same variant.
### Collect guest details
**Don't worry!** The current integration continues to work as-is, with input fields from [Get Product](/docs/api-partner/v2/products/get) remaining valid for booking submissions. Only \~5% of slots have supplier-specific overrides that differ from the variant definition, and this step ensures those edge cases are handled correctly.
**API:** [Get Inventory Details by ID](/docs/api-partner/v2/inventory/details)
Once the customer picks a slot, fetch the exact input fields required for that inventory before rendering your booking form. Fields vary by inventory — common examples include pickup location, drop-off address, nationality, passport number, meal preference, hotel name, age, and weight.
Pass the `id` from the selected inventory as `inventoryId`.
**What you get:** an `inputFields` array where each field carries a numeric `id`, a `dataType` (`STRING`, `INT`, `ENUM`, `LOCATION`, etc.), validation rules, and a `level` (`PRIMARY_CUSTOMER` or `ALL_CUSTOMER`).
Use `level` to decide which guests need each field: `PRIMARY_CUSTOMER` fields are collected once for the lead traveller only; `ALL_CUSTOMER` fields must be collected for every traveller in the booking.
### Create the booking
**API:** [Create Booking](/docs/api-partner/v2/bookings/create)
Submit the selected slot, guest details, and pax counts. The booking starts in `UNCAPTURED`, then moves to `PENDING` after payment capture.
**What you get:** a booking object with a `bookingId` and initial status.
### Keep the user updated
**APIs:** [Get Booking](/docs/api-partner/v2/bookings/get) · [List Bookings](/docs/api-partner/v2/bookings/list)
Poll the booking or listen for webhooks. When the booking reaches `COMPLETED`, the ticket data is ready to show to the customer.
**Status progression:** `PENDING` → `COMPLETED` / `FAILED` / `CANCELLED`
**APIs:** [Create Webhook](/docs/api-partner/v2/webhooks/create) · [Webhook Payload](/docs/api-partner/v2/webhooks/create#webhook-payload)
Register a webhook so status changes arrive automatically instead of relying on polling.
**What you receive:** `bookingId`, new `status`, and `eventTimestamp`.
**APIs:** [Cancel Booking](/docs/api-partner/v2/bookings/cancel) · [Reschedule Booking](/docs/api-partner/v2/bookings/reschedule)
Use the booking policies returned by product details to decide whether a customer can change or cancel a booking.
### Integration paths
There are three ways to integrate seatmap products. Choose the one that fits your use case.
Embed the Headout seat selection iframe. Partners receive seat IDs and pricing via iframe events, then call Validate and proceed to booking. Fastest path to selling seatmap products.
**APIs:** [Seatmap Availabilities](/docs/api-partner/v2/seatmap/availabilities-by-variant) · [Venue Iframe](/docs/api-partner/v2/seatmap/iframe) · [Seat Map Validate](/docs/api-partner/v2/seatmap/validate) · [Create Booking](/docs/api-partner/v2/bookings/create)
Build the seat selection UI using Headout's inventory and venue layout data. Full control over the experience.
**APIs:** [Seatmap Availabilities](/docs/api-partner/v2/seatmap/availabilities-by-variant) · [List Inventory - Seatmap](/docs/api-partner/v2/seatmap/inventory) · [Venue Map](/docs/api-partner/v2/seatmap/svg) · [Seat Map Validate](/docs/api-partner/v2/seatmap/validate) · [Create Booking](/docs/api-partner/v2/bookings/create)
Partner exposes available sections. Customer selects a section. Partner books any available seats from that section. No seat-level UI required.
**APIs:** [Seatmap Availabilities](/docs/api-partner/v2/seatmap/availabilities-by-variant) · [List Inventory - Seatmap](/docs/api-partner/v2/seatmap/inventory) · [Seat Map Validate](/docs/api-partner/v2/seatmap/validate) · [Create Booking](/docs/api-partner/v2/bookings/create)
***
### Discover what to sell
**API:** [List Cities](/docs/api-partner/v2/cities/list)
Start by fetching the cities Headout supports. Each product is tied to a city.
**What you get:** city code, city name, country, and coordinates.
**API:** [List Products](/docs/api-partner/v2/products/list)
Use the city code to fetch the products available in that market.
**What you get:** product summaries, titles, pricing, media, and category metadata. Look for `inventorySelectionType: SEATMAP` to identify seatmap products.
**API:** [Get Product](/docs/api-partner/v2/products/get)
Pull the full product record for variants, policies, media, and booking fields.
**What you get:** variants (including the `variantId` to use in seatmap APIs), pricing tiers, input field definitions, and policies.
### Check show availability
**API:** [Seatmap Availabilities](/docs/api-partner/v2/seatmap/availabilities-by-variant)
Pass `productId` and `variantId` to get available show dates and time slots with per-slot pricing and remaining seat counts.
**What you get:** available dates and slots, each with `startTime`, nested `pricing` (`headoutSellingPrice` and `netPrice`), and `remaining` seat count. Carry the `variantId` forward.
Pricing here reflects the cheapest available seat on that slot. Actual per-seat prices come from the Inventory API.
### Select seats
Choose one integration path:
**API:** [List Inventory - Seatmap](/docs/api-partner/v2/seatmap/inventory)
Pass `productId`, `variantId`, `date`, and `startTime` to get all available seats for that show, grouped by section.
**What you get:** a show-level `inventoryId` (carry this to Validate and Booking), all available seats with `seatCode`, `row`, `seatNumber`, `seatType`, and per-seat `pricing`.
**API:** [Venue Map](/docs/api-partner/v2/seatmap/svg)
Fetch the venue layout SVG URL. The SVG represents the physical layout — sections, rows, and seat positions. Static per product — call once and cache.
Use the SVG and Inventory response together:
1. Render the SVG as the base layout. Each seat has an identifier matching the `seatCode` in the Inventory response.
2. Mark seats returned by Inventory as selectable with their price.
3. Mark seats absent from Inventory as unavailable.
4. When a customer clicks a seat, collect its `seatCode` for Validate and Booking.
**API:** [List Inventory - Seatmap](/docs/api-partner/v2/seatmap/inventory)
Pass `productId`, `variantId`, `date`, and `startTime` to get all available seats grouped by section.
**What you get:** a show-level `inventoryId`, all seats grouped by `sectionName` with `seatCode` and per-seat `pricing`.
From the Inventory response, extract the unique sections and display them to the customer (e.g. Stalls, Royal Circle, Grand Circle). The customer picks a section — not individual seats.
Take any available `seatCode` values from the customer's chosen section and pass them as `inventorySeatIds` in the Booking request. The customer does not see or pick individual seats.
Before going live, contact the Headout partnerships team with the domain(s) you intend to embed the iframe on. Headout will add them to the `ALLOWED_DOMAINS` list.
* Requests from un-whitelisted domains return `403 Forbidden`.
* The check is against the browser-sent `Referer` header — ensure the embedding page does not set `Referrer-Policy: no-referrer` or `strict-origin-when-cross-origin`.
* Subdomains of a whitelisted domain are automatically permitted.
**API:** [Venue Iframe](/docs/api-partner/v2/seatmap/iframe)
Add the iframe to your page using the `productId`:
```html theme={"theme":{"light":"github-light","dark":"github-dark"}}
```
The iframe does not load seats automatically — you must complete the initialisation handshake via `postMessage`.
Once the iframe loads, send `init`. The iframe responds with `iframeInitCompleted`. Then send `initPlugin` with the date, time, and currency from the Availabilities response:
```js theme={"theme":{"light":"github-light","dark":"github-dark"}}
const iframe = document.getElementById('seatmap-iframe');
iframe.addEventListener('load', () => {
iframe.contentWindow.postMessage(JSON.stringify({ type: 'init' }), 'https://www.headout.com');
});
window.addEventListener('message', (event) => {
if (event.origin !== 'https://www.headout.com') return;
let msg;
try { msg = JSON.parse(event.data); } catch { return; }
if (msg.type === 'iframeInitCompleted') {
iframe.contentWindow.postMessage(JSON.stringify({
type: 'initPlugin',
data: { options: { date: '2026-06-15', time: '19:30', currencyCode: 'GBP' } },
}), 'https://www.headout.com');
}
});
```
Listen for `onSeatSelectionSubmitted`. The `seats` array in the event payload contains everything needed for Validate and Booking:
| Field | Use |
| ----------------- | -------------------------------------------------- |
| `seatCode` | Pass as `inventorySeatIds` in Validate and Booking |
| `inventorySlotId` | Pass as `inventoryId` in Validate and Booking |
| `price` | Per-seat price in the selected currency |
See [Venue Iframe](/docs/api-partner/v2/seatmap/iframe) for the full event reference.
### Collect guest details
**Don't worry!** The current integration continues to work as-is, with input fields from [Get Product](/docs/api-partner/v2/products/get) remaining valid for booking submissions. Only \~5% of inventories have supplier-specific overrides that differ from the variant definition, and this step ensures those edge cases are handled correctly.
**API:** [Get Inventory Details by ID](/docs/api-partner/v2/inventory/details)
Use the show-level `inventoryId` from the seatmap inventory response (or `inventorySlotId` from the iframe event) to fetch the exact input fields required before rendering your booking form.
**What you get:** an `inputFields` array where each field carries a numeric `id`, a `dataType` (`STRING`, `INT`, `ENUM`, `LOCATION`, etc.), validation rules, and a `level` (`PRIMARY_CUSTOMER` or `ALL_CUSTOMER`).
Use `level` to decide which guests need each field: `PRIMARY_CUSTOMER` fields are collected once for the lead traveller only; `ALL_CUSTOMER` fields must be collected for every traveller in the booking.
### Validate seats
**API:** [Seatmap Validate](/docs/api-partner/v2/seatmap/validate)
Submit `inventoryId` and selected `seatCodes` for a live availability and pricing check before checkout.
**What you get:** per-seat `isAvailable` and current `pricing`. Always check the `validationErrors` array — a 200 response does not mean all seats are bookable.
| Error code | Meaning |
| -------------------------- | ---------------------------------------------- |
| `SEAT_UNAVAILABLE` | Seat exists but cannot be booked |
| `SEAT_NOT_FOUND` | Seat code does not exist in this venue |
| `ADJACENCY_RULE_VIOLATION` | Seat combination violates a venue seating rule |
`ADJACENCY_RULE_VIOLATION` means the seat itself is available — it is the combination that violates the venue's rule. Prompt the customer to adjust their selection.
Common rules: seats must be consecutive (no gaps); selecting an end seat that leaves a single unsold neighbour is not allowed; all seats at a table must be selected together.
Use the prices from this response in the Booking request. Prices can change between Inventory and Validate.
### Create the booking
**API:** [Create Booking](/docs/api-partner/v2/bookings/create)
Submit the booking with `variantId`, `inventoryId`, and `inventorySeatIds` (the seat codes from any section — mix freely across sections). Customer details go in `customersDetails.customers[]` with `inputFields` for `NAME`, `EMAIL`, and `PHONE`. Set `price.amount` to the sum of `netPrice` from the Validate response — the booking will be rejected if the price doesn't match.
**What you get:** a booking object with `bookingId`, status `UNCAPTURED`, and a `seats` array confirming the reserved seats.
**API:** [Update Booking](/docs/api-partner/v2/bookings/update)
Set `status` to `PENDING` with a `partnerReferenceId` to confirm and trigger fulfilment.
### Keep the user updated
**APIs:** [Get Booking](/docs/api-partner/v2/bookings/get) · [List Bookings](/docs/api-partner/v2/bookings/list)
Poll the booking or listen for webhooks. When the booking reaches `COMPLETED`, the ticket data is ready to show to the customer.
**Status progression:** `PENDING` → `COMPLETED` / `FAILED` / `CANCELLED`
**APIs:** [Create Webhook](/docs/api-partner/v2/webhooks/create) · [Webhook Payload](/docs/api-partner/v2/webhooks/create#webhook-payload)
Register a webhook so status changes arrive automatically instead of relying on polling.
SVG flow products use a venue map SVG to show customers the venue layout. The customer selects a section, and seat assignment is handled automatically at booking time.
***
### Discover what to sell
**API:** [List Cities](/docs/api-partner/v2/cities/list)
Start by fetching the cities Headout supports. Each product is tied to a city.
**What you get:** city code, city name, country, and coordinates.
**API:** [List Products](/docs/api-partner/v2/products/list)
Use the city code to fetch the products available in that market.
**What you get:** product summaries, titles, pricing, media, and category metadata. Look for `inventorySelectionType: SVG` to identify SVG flow products.
**API:** [Get Product](/docs/api-partner/v2/products/get)
Pull the full product record for variants, policies, media, and booking fields.
**What you get:** variants (each representing a section, identified by `variantId`), pricing tiers, input field definitions, and policies.
### Check availability
**API:** [List Availabilities](/docs/api-partner/v2/availabilities/normal-availabilities)
Pass `productId` and `variantId` (the section) to get available dates for that section.
**What you get:** available dates, availability status (`LIMITED`, `UNLIMITED`, `CLOSED`), remaining count, and pricing per date.
### Get venue map and inventory
**API:** [Venue Map](/docs/api-partner/v2/seatmap/svg)
Fetch the venue layout SVG using the product ID. The SVG is static per product — call once and cache it.
Each section in the SVG has a class attribute in the format `tour-id-{variantId}`. Match the chosen variant ID from the product response to the SVG element's class to identify the correct section.
**API:** [List Inventory - Normal](/docs/api-partner/v2/inventory/list-by-tour)
Pass the selected date and `variantId` (the section). The response includes all available show times for that section on the selected date, each with pricing and an `inventoryId` required for booking.
### Create the booking
**API:** [Create Booking](/docs/api-partner/v2/bookings/create)
Submit the booking with `variantId`, `inventoryId`, and customer details. Seat assignment is handled automatically.
**What you get:** a booking object with `bookingId` and initial status `UNCAPTURED`.
**API:** [Update Booking](/docs/api-partner/v2/bookings/update)
Set `status` to `PENDING` with a `partnerReferenceId` to confirm and trigger fulfilment.
### Keep the user updated
**APIs:** [Get Booking](/docs/api-partner/v2/bookings/get) · [List Bookings](/docs/api-partner/v2/bookings/list)
Poll the booking or listen for webhooks. When the booking reaches `COMPLETED`, the ticket data is ready to show to the customer.
**Status progression:** `PENDING` → `COMPLETED` / `FAILED` / `CANCELLED`
**APIs:** [Create Webhook](/docs/api-partner/v2/webhooks/create) · [Webhook Payload](/docs/api-partner/v2/webhooks/create#webhook-payload)
Register a webhook so status changes arrive automatically instead of relying on polling.
Affiliate teams show Headout inventory in their own storefront and hand the booking off to Headout checkout.
### Discover what to show
**API:** [List Cities](/docs/affiliate/v2/cities/list)
Fetch the cities where Headout has inventory, then use that list to scope the storefront.
**What you get:** city code, city name, country, and coordinates.
**APIs:** [List Collections](/docs/affiliate/v2/collections/list) · [List Categories](/docs/affiliate/v2/categories/list) · [List Subcategories](/docs/affiliate/v2/subcategories/list)
Use these optional filters to organize the storefront and help users browse faster.
**What you get:** IDs and names for filtering the Products API.
### Show product details
**API:** [List Products](/docs/affiliate/v2/products/list)
Retrieve the products for a city and optionally filter by collection, category, or subcategory.
**What you get:** product titles, pricing, ratings, media, and deep-link URLs.
Products may have `inventorySelectionType: NORMAL`, `SEATMAP`, or `SVG`. For affiliates, the booking flow is identical across all types — customers are always sent to Headout checkout via the deep-link URL.
**API:** [Get Product](/docs/affiliate/v2/products/get)
Use this when you need the full content for a product page, including media, variants, and policy summaries.
**What you get:** Rich product content including `canonicalUrl`, `localeSpecificUrls` (localized deep-links per language), pricing per variant, and `hasInstantConfirmation` flag.
See the section below on variant metadata for how to handle `properties` and `propertiesV2` in the response.
Use `localeSpecificUrls[languageCode]` (or `canonicalUrl` as fallback) to send users directly to Headout's checkout for the selected language. This is how Affiliate bookings are attributed to your account.
### Check availability
**API:** [List availabilities - Normal](/docs/affiliate/v2/availabilities/normal-availabilities)
Fetch available dates and pricing for a specific variant within a date range. Use this to show a calendar or highlight available dates on your product page.
**What you get:** available dates, availability status (`LIMITED`, `UNLIMITED`, `CLOSED`), remaining count, and `commissionAmount` per date.
`remaining: 1000` is a sentinel value indicating unlimited availability.
### Send the customer to checkout
Use the `canonicalUrl` or `localeSpecificUrls[languageCode]` from the product details response to send the customer directly to Headout's checkout page. Bookings made via your deep-link are automatically attributed to your affiliate account.
### Track your bookings
**API:** [List Bookings](/docs/affiliate/v2/bookings/list)
Retrieve all bookings attributed to your account within a date range. Use this to reconcile earnings, audit attribution, and build your own reporting dashboard.
**What you get:** booking status, product name, price in local currency and USD, your earnings in USD, attribution type (`WEB` or `APP`), UTM parameters, and basic user info.
Use `attributionType` to understand how each booking was attributed — `WEB` for cookie-based deep-link attribution, `APP` for mobile app.
**API:** [Get Booking](/docs/affiliate/v2/bookings/get)
Fetch the full details for a specific booking by its `bookingId`. Returns `404` if the booking does not belong to your account.
**What you get:** the same fields as the list response, scoped to one booking.
The [Get Product](/docs/api-partner/v2/products/get) response includes an `inventorySelectionType` field. Use it to determine which integration flow applies:
* **`NORMAL`**: Standard general-admission products (guided tours, timed-entry attractions, activities). Customer selects a date, variant, and optional time slot; no seat or section assignment required.
* **`SEATMAP`**: Products with specific seat selection. Customer picks individual seats from an interactive seatmap.
* **`SVG`**: Products with section-based seating. Customer selects a section; seat assignment is automatic.
### Discover what to sell
**API:** [List Cities](/docs/api-partner/v2/cities/list)
Start by fetching the cities Headout supports. Each product is tied to a city.
**What you get:** city code, city name, country, and coordinates.
**API:** [List Products](/docs/api-partner/v2/products/list)
Use the city code to fetch the products available in that market. Filter by collection, category, currency, or language.
**What you get:** product summaries, titles, pricing, media, and category metadata.
**API:** [Get Product](/docs/api-partner/v2/products/get)
Pull the full product record for variants, policies, media, and booking fields required later in the flow.
**What you get:** variants, pricing tiers, input field definitions, cancellation and reschedule policies, and deep-link URLs.
Read each variant's `inputFields` carefully. They define the guest data you must collect before creating the booking.
### Check availability
**API:** [List availabilities - Normal](/docs/api-partner/v2/availabilities/normal-availabilities)
Fetch available dates and pricing for a specific variant within a date range. Use this to build a calendar or date picker before the customer selects a specific slot.
**What you get:** available dates, availability status (`LIMITED`, `UNLIMITED`, `CLOSED`), remaining count, and minimum pricing per date.
`remaining: 1000` is a sentinel value indicating unlimited availability.
**API:** [List Inventory - Normal](/docs/api-partner/v2/inventory/list-by-tour)
Once the customer selects a date, fetch real-time slot inventory. Inventory is slot-based and can change quickly, so do not cache it.
**What you get:** time slots, pax types, `netPrice`, and `headoutSellingPrice`.
Never sell below `headoutSellingPrice`. Pax types and prices can vary by slot even for the same variant.
### Collect guest details
**Don't worry!** The current integration continues to work as-is, with input fields from [Get Product](/docs/api-partner/v2/products/get) remaining valid for booking submissions. Only \~5% of slots have supplier-specific overrides that differ from the variant definition, and this step ensures those edge cases are handled correctly.
**API:** [Get Inventory Details by ID](/docs/api-partner/v2/inventory/details)
Once the customer picks a slot, fetch the exact input fields required for that inventory before rendering your booking form. Fields vary by inventory — common examples include pickup location, drop-off address, nationality, passport number, meal preference, hotel name, age, and weight.
Pass the `id` from the selected inventory as `inventoryId`.
**What you get:** an `inputFields` array where each field carries a numeric `id`, a `dataType` (`STRING`, `INT`, `ENUM`, `LOCATION`, etc.), validation rules, and a `level` (`PRIMARY_CUSTOMER` or `ALL_CUSTOMER`).
Use `level` to decide which guests need each field: `PRIMARY_CUSTOMER` fields are collected once for the lead traveller only; `ALL_CUSTOMER` fields must be collected for every traveller in the booking.
### Create the booking
**API:** [Create Booking](/docs/api-partner/v2/bookings/create)
Submit the selected slot, guest details, and pax counts. The booking starts in `UNCAPTURED`, then moves to `PENDING` after payment capture.
**What you get:** a booking object with a `bookingId` and initial status.
### Keep the user updated
**APIs:** [Get Booking](/docs/api-partner/v2/bookings/get) · [List Bookings](/docs/api-partner/v2/bookings/list)
Poll the booking or listen for webhooks. When the booking reaches `COMPLETED`, the ticket data is ready to show to the customer.
**Status progression:** `PENDING` → `COMPLETED` / `FAILED` / `CANCELLED`
**APIs:** [Create Webhook](/docs/api-partner/v2/webhooks/create) · [Webhook Payload](/docs/api-partner/v2/webhooks/create#webhook-payload)
Register a webhook so status changes arrive automatically instead of relying on polling.
**What you receive:** `bookingId`, new `status`, and `eventTimestamp`.
**APIs:** [Cancel Booking](/docs/api-partner/v2/bookings/cancel) · [Reschedule Booking](/docs/api-partner/v2/bookings/reschedule)
Use the booking policies returned by product details to decide whether a customer can change or cancel a booking.
### Integration paths
There are three ways to integrate seatmap products. Choose the one that fits your use case.
Embed the Headout seat selection iframe. Partners receive seat IDs and pricing via iframe events, then call Validate and proceed to booking. Fastest path to selling seatmap products.
**APIs:** [Seatmap Availabilities](/docs/api-partner/v2/seatmap/availabilities-by-variant) · [Venue Iframe](/docs/api-partner/v2/seatmap/iframe) · [Seat Map Validate](/docs/api-partner/v2/seatmap/validate) · [Create Booking](/docs/api-partner/v2/bookings/create)
Build the seat selection UI using Headout's inventory and venue layout data. Full control over the experience.
**APIs:** [Seatmap Availabilities](/docs/api-partner/v2/seatmap/availabilities-by-variant) · [List Inventory - Seatmap](/docs/api-partner/v2/seatmap/inventory) · [Venue Map](/docs/api-partner/v2/seatmap/svg) · [Seat Map Validate](/docs/api-partner/v2/seatmap/validate) · [Create Booking](/docs/api-partner/v2/bookings/create)
Partner exposes available sections. Customer selects a section. Partner books any available seats from that section. No seat-level UI required.
**APIs:** [Seatmap Availabilities](/docs/api-partner/v2/seatmap/availabilities-by-variant) · [List Inventory - Seatmap](/docs/api-partner/v2/seatmap/inventory) · [Seat Map Validate](/docs/api-partner/v2/seatmap/validate) · [Create Booking](/docs/api-partner/v2/bookings/create)
***
### Discover what to sell
**API:** [List Cities](/docs/api-partner/v2/cities/list)
Start by fetching the cities Headout supports. Each product is tied to a city.
**What you get:** city code, city name, country, and coordinates.
**API:** [List Products](/docs/api-partner/v2/products/list)
Use the city code to fetch the products available in that market.
**What you get:** product summaries, titles, pricing, media, and category metadata. Look for `inventorySelectionType: SEATMAP` to identify seatmap products.
**API:** [Get Product](/docs/api-partner/v2/products/get)
Pull the full product record for variants, policies, media, and booking fields.
**What you get:** variants (including the `variantId` to use in seatmap APIs), pricing tiers, input field definitions, and policies.
### Check show availability
**API:** [Seatmap Availabilities](/docs/api-partner/v2/seatmap/availabilities-by-variant)
Pass `productId` and `variantId` to get available show dates and time slots with per-slot pricing and remaining seat counts.
**What you get:** available dates and slots, each with `startTime`, nested `pricing` (`headoutSellingPrice` and `netPrice`), and `remaining` seat count. Carry the `variantId` forward.
Pricing here reflects the cheapest available seat on that slot. Actual per-seat prices come from the Inventory API.
### Select seats
Choose one integration path:
**API:** [List Inventory - Seatmap](/docs/api-partner/v2/seatmap/inventory)
Pass `productId`, `variantId`, `date`, and `startTime` to get all available seats for that show, grouped by section.
**What you get:** a show-level `inventoryId` (carry this to Validate and Booking), all available seats with `seatCode`, `row`, `seatNumber`, `seatType`, and per-seat `pricing`.
**API:** [Venue Map](/docs/api-partner/v2/seatmap/svg)
Fetch the venue layout SVG URL. The SVG represents the physical layout — sections, rows, and seat positions. Static per product — call once and cache.
Use the SVG and Inventory response together:
1. Render the SVG as the base layout. Each seat has an identifier matching the `seatCode` in the Inventory response.
2. Mark seats returned by Inventory as selectable with their price.
3. Mark seats absent from Inventory as unavailable.
4. When a customer clicks a seat, collect its `seatCode` for Validate and Booking.
**API:** [List Inventory - Seatmap](/docs/api-partner/v2/seatmap/inventory)
Pass `productId`, `variantId`, `date`, and `startTime` to get all available seats grouped by section.
**What you get:** a show-level `inventoryId`, all seats grouped by `sectionName` with `seatCode` and per-seat `pricing`.
From the Inventory response, extract the unique sections and display them to the customer (e.g. Stalls, Royal Circle, Grand Circle). The customer picks a section — not individual seats.
Take any available `seatCode` values from the customer's chosen section and pass them as `inventorySeatIds` in the Booking request. The customer does not see or pick individual seats.
Before going live, contact the Headout partnerships team with the domain(s) you intend to embed the iframe on. Headout will add them to the `ALLOWED_DOMAINS` list.
* Requests from un-whitelisted domains return `403 Forbidden`.
* The check is against the browser-sent `Referer` header — ensure the embedding page does not set `Referrer-Policy: no-referrer` or `strict-origin-when-cross-origin`.
* Subdomains of a whitelisted domain are automatically permitted.
**API:** [Venue Iframe](/docs/api-partner/v2/seatmap/iframe)
Add the iframe to your page using the `productId`:
```html theme={"theme":{"light":"github-light","dark":"github-dark"}}
```
The iframe does not load seats automatically — you must complete the initialisation handshake via `postMessage`.
Once the iframe loads, send `init`. The iframe responds with `iframeInitCompleted`. Then send `initPlugin` with the date, time, and currency from the Availabilities response:
```js theme={"theme":{"light":"github-light","dark":"github-dark"}}
const iframe = document.getElementById('seatmap-iframe');
iframe.addEventListener('load', () => {
iframe.contentWindow.postMessage(JSON.stringify({ type: 'init' }), 'https://www.headout.com');
});
window.addEventListener('message', (event) => {
if (event.origin !== 'https://www.headout.com') return;
let msg;
try { msg = JSON.parse(event.data); } catch { return; }
if (msg.type === 'iframeInitCompleted') {
iframe.contentWindow.postMessage(JSON.stringify({
type: 'initPlugin',
data: { options: { date: '2026-06-15', time: '19:30', currencyCode: 'GBP' } },
}), 'https://www.headout.com');
}
});
```
Listen for `onSeatSelectionSubmitted`. The `seats` array in the event payload contains everything needed for Validate and Booking:
| Field | Use |
| ----------------- | -------------------------------------------------- |
| `seatCode` | Pass as `inventorySeatIds` in Validate and Booking |
| `inventorySlotId` | Pass as `inventoryId` in Validate and Booking |
| `price` | Per-seat price in the selected currency |
See [Venue Iframe](/docs/api-partner/v2/seatmap/iframe) for the full event reference.
### Collect guest details
**Don't worry!** The current integration continues to work as-is, with input fields from [Get Product](/docs/api-partner/v2/products/get) remaining valid for booking submissions. Only \~5% of inventories have supplier-specific overrides that differ from the variant definition, and this step ensures those edge cases are handled correctly.
**API:** [Get Inventory Details by ID](/docs/api-partner/v2/inventory/details)
Use the show-level `inventoryId` from the seatmap inventory response (or `inventorySlotId` from the iframe event) to fetch the exact input fields required before rendering your booking form.
**What you get:** an `inputFields` array where each field carries a numeric `id`, a `dataType` (`STRING`, `INT`, `ENUM`, `LOCATION`, etc.), validation rules, and a `level` (`PRIMARY_CUSTOMER` or `ALL_CUSTOMER`).
Use `level` to decide which guests need each field: `PRIMARY_CUSTOMER` fields are collected once for the lead traveller only; `ALL_CUSTOMER` fields must be collected for every traveller in the booking.
### Validate seats
**API:** [Seatmap Validate](/docs/api-partner/v2/seatmap/validate)
Submit `inventoryId` and selected `seatCodes` for a live availability and pricing check before checkout.
**What you get:** per-seat `isAvailable` and current `pricing`. Always check the `validationErrors` array — a 200 response does not mean all seats are bookable.
| Error code | Meaning |
| -------------------------- | ---------------------------------------------- |
| `SEAT_UNAVAILABLE` | Seat exists but cannot be booked |
| `SEAT_NOT_FOUND` | Seat code does not exist in this venue |
| `ADJACENCY_RULE_VIOLATION` | Seat combination violates a venue seating rule |
`ADJACENCY_RULE_VIOLATION` means the seat itself is available — it is the combination that violates the venue's rule. Prompt the customer to adjust their selection.
Common rules: seats must be consecutive (no gaps); selecting an end seat that leaves a single unsold neighbour is not allowed; all seats at a table must be selected together.
Use the prices from this response in the Booking request. Prices can change between Inventory and Validate.
### Create the booking
**API:** [Create Booking](/docs/api-partner/v2/bookings/create)
Submit the booking with `variantId`, `inventoryId`, and `inventorySeatIds` (the seat codes from any section — mix freely across sections). Customer details go in `customersDetails.customers[]` with `inputFields` for `NAME`, `EMAIL`, and `PHONE`. Set `price.amount` to the sum of `netPrice` from the Validate response — the booking will be rejected if the price doesn't match.
**What you get:** a booking object with `bookingId`, status `UNCAPTURED`, and a `seats` array confirming the reserved seats.
**API:** [Update Booking](/docs/api-partner/v2/bookings/update)
Set `status` to `PENDING` with a `partnerReferenceId` to confirm and trigger fulfilment.
### Keep the user updated
**APIs:** [Get Booking](/docs/api-partner/v2/bookings/get) · [List Bookings](/docs/api-partner/v2/bookings/list)
Poll the booking or listen for webhooks. When the booking reaches `COMPLETED`, the ticket data is ready to show to the customer.
**Status progression:** `PENDING` → `COMPLETED` / `FAILED` / `CANCELLED`
**APIs:** [Create Webhook](/docs/api-partner/v2/webhooks/create) · [Webhook Payload](/docs/api-partner/v2/webhooks/create#webhook-payload)
Register a webhook so status changes arrive automatically instead of relying on polling.
SVG flow products use a venue map SVG to show customers the venue layout. The customer selects a section, and seat assignment is handled automatically at booking time.
***
### Discover what to sell
**API:** [List Cities](/docs/api-partner/v2/cities/list)
Start by fetching the cities Headout supports. Each product is tied to a city.
**What you get:** city code, city name, country, and coordinates.
**API:** [List Products](/docs/api-partner/v2/products/list)
Use the city code to fetch the products available in that market.
**What you get:** product summaries, titles, pricing, media, and category metadata. Look for `inventorySelectionType: SVG` to identify SVG flow products.
**API:** [Get Product](/docs/api-partner/v2/products/get)
Pull the full product record for variants, policies, media, and booking fields.
**What you get:** variants (each representing a section, identified by `variantId`), pricing tiers, input field definitions, and policies.
### Check availability
**API:** [List Availabilities](/docs/api-partner/v2/availabilities/normal-availabilities)
Pass `productId` and `variantId` (the section) to get available dates for that section.
**What you get:** available dates, availability status (`LIMITED`, `UNLIMITED`, `CLOSED`), remaining count, and pricing per date.
### Get venue map and inventory
**API:** [Venue Map](/docs/api-partner/v2/seatmap/svg)
Fetch the venue layout SVG using the product ID. The SVG is static per product — call once and cache it.
Each section in the SVG has a class attribute in the format `tour-id-{variantId}`. Match the chosen variant ID from the product response to the SVG element's class to identify the correct section.
**API:** [List Inventory - Normal](/docs/api-partner/v2/inventory/list-by-tour)
Pass the selected date and `variantId` (the section). The response includes all available show times for that section on the selected date, each with pricing and an `inventoryId` required for booking.
### Create the booking
**API:** [Create Booking](/docs/api-partner/v2/bookings/create)
Submit the booking with `variantId`, `inventoryId`, and customer details. Seat assignment is handled automatically.
**What you get:** a booking object with `bookingId` and initial status `UNCAPTURED`.
**API:** [Update Booking](/docs/api-partner/v2/bookings/update)
Set `status` to `PENDING` with a `partnerReferenceId` to confirm and trigger fulfilment.
### Keep the user updated
**APIs:** [Get Booking](/docs/api-partner/v2/bookings/get) · [List Bookings](/docs/api-partner/v2/bookings/list)
Poll the booking or listen for webhooks. When the booking reaches `COMPLETED`, the ticket data is ready to show to the customer.
**Status progression:** `PENDING` → `COMPLETED` / `FAILED` / `CANCELLED`
**APIs:** [Create Webhook](/docs/api-partner/v2/webhooks/create) · [Webhook Payload](/docs/api-partner/v2/webhooks/create#webhook-payload)
Register a webhook so status changes arrive automatically instead of relying on polling.
Affiliate teams show Headout inventory in their own storefront and hand the booking off to Headout checkout.
### Discover what to show
**API:** [List Cities](/docs/affiliate/v2/cities/list)
Fetch the cities where Headout has inventory, then use that list to scope the storefront.
**What you get:** city code, city name, country, and coordinates.
**APIs:** [List Collections](/docs/affiliate/v2/collections/list) · [List Categories](/docs/affiliate/v2/categories/list) · [List Subcategories](/docs/affiliate/v2/subcategories/list)
Use these optional filters to organize the storefront and help users browse faster.
**What you get:** IDs and names for filtering the Products API.
### Show product details
**API:** [List Products](/docs/affiliate/v2/products/list)
Retrieve the products for a city and optionally filter by collection, category, or subcategory.
**What you get:** product titles, pricing, ratings, media, and deep-link URLs.
Products may have `inventorySelectionType: NORMAL`, `SEATMAP`, or `SVG`. For affiliates, the booking flow is identical across all types — customers are always sent to Headout checkout via the deep-link URL.
**API:** [Get Product](/docs/affiliate/v2/products/get)
Use this when you need the full content for a product page, including media, variants, and policy summaries.
**What you get:** Rich product content including `canonicalUrl`, `localeSpecificUrls` (localized deep-links per language), pricing per variant, and `hasInstantConfirmation` flag.
See the section below on variant metadata for how to handle `properties` and `propertiesV2` in the response.
Use `localeSpecificUrls[languageCode]` (or `canonicalUrl` as fallback) to send users directly to Headout's checkout for the selected language. This is how Affiliate bookings are attributed to your account.
### Check availability
**API:** [List availabilities - Normal](/docs/affiliate/v2/availabilities/normal-availabilities)
Fetch available dates and pricing for a specific variant within a date range. Use this to show a calendar or highlight available dates on your product page.
**What you get:** available dates, availability status (`LIMITED`, `UNLIMITED`, `CLOSED`), remaining count, and `commissionAmount` per date.
`remaining: 1000` is a sentinel value indicating unlimited availability.
### Send the customer to checkout
Use the `canonicalUrl` or `localeSpecificUrls[languageCode]` from the product details response to send the customer directly to Headout's checkout page. Bookings made via your deep-link are automatically attributed to your affiliate account.
### Track your bookings
**API:** [List Bookings](/docs/affiliate/v2/bookings/list)
Retrieve all bookings attributed to your account within a date range. Use this to reconcile earnings, audit attribution, and build your own reporting dashboard.
**What you get:** booking status, product name, price in local currency and USD, your earnings in USD, attribution type (`WEB` or `APP`), UTM parameters, and basic user info.
Use `attributionType` to understand how each booking was attributed — `WEB` for cookie-based deep-link attribution, `APP` for mobile app.
**API:** [Get Booking](/docs/affiliate/v2/bookings/get)
Fetch the full details for a specific booking by its `bookingId`. Returns `404` if the booking does not belong to your account.
**What you get:** the same fields as the list response, scoped to one booking.